Showing posts with label Novelty Fabrics. Show all posts

Saturday, August 27, 2022

Maymont

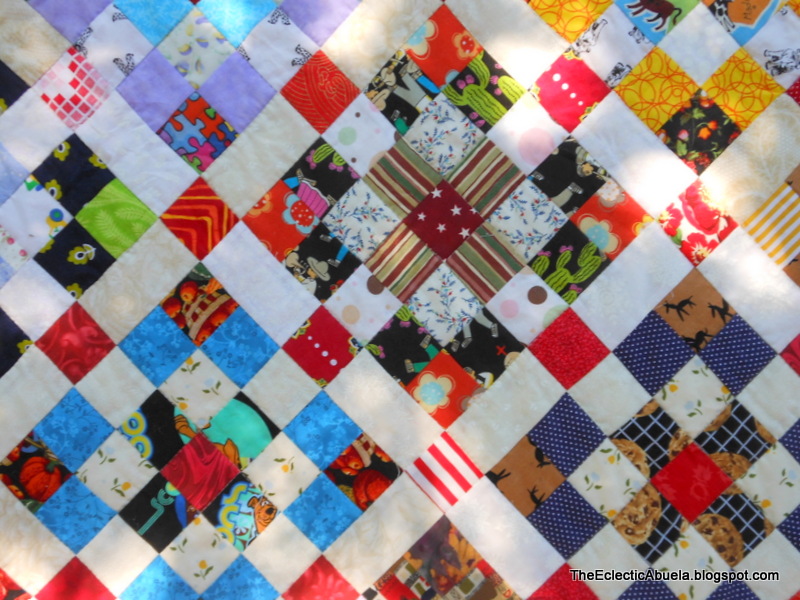
Maymont--A Bonnie Hunter design--80" x 92"


Earlier this summer, I began Maymont, a design by Bonnie Hunter. That post is HERE.

This quilt is a hodge-podge of fun fabrics.

Maymont (fabric detail)


Maymont (fabric detail)


Maymont (fabric detail)

 I had so much fun re-visiting some of these fabrics! They make an overall impression, but when you look more closely there is much to find.

I backed it with a favorite floral--to me, these look like the painted roses in Alice. I was fortunate to have a binding fabric that complemented the backing--the shades of color are almost identical!

Maymont (backing and binding detail)

Unlike the original pattern, I used reds for all the cornerstones to bring a bit of control to my crazy riot of scraps.

This is a great pattern. Thanks, Bonnie!

Happy Quilting! 😸


Monday, April 4, 2022

Three Finishes

 I haven't been posting much lately, but the quiltmaking continues!


This is a flannel couch quilt. A dear friend gave me some flannels, and I added a few of my own to the mix. I backed it with a piece of fleece I had on hand that happened to be exactly the right size!


Old-Style Winter Print Flannel (60" x 71")

Old-Style Winter Print Flannel (detail)

Old-Style Winter Print Flannel (backing and binding detail)

Next up is a Hallowe'en Trip Around the World. I know it is out-of-season, but next October, I'll be ready! 🎃 I call this one Spooky Trip Around the World.


Spooky Trip Around the World (90" x 90")


Spooky Trip Around the World (edge detail)


Spooky Trip Around the World (center detail)


This third quilt is a Bonnie Hunter design called Boxy Bow Ties. For some reasons, it sits in my brain as Botox Ties! Other than string quilts, this might be the scrappiest quilt I've ever made. There is a little of everything in here. I added a few extra cornerstones in the sashing that weren't part of the original design.


Boxy Bow Ties (94" x 94")

Boxy Bow Ties (detail)

Boxy Bow Ties (detail)


Boxy Bow Ties (backing and binding detail)


I'm still working on the Bonnie Hunter mystery quilt, Rhododendron Trail, and I'm doing her Hearts of Hope quiltalong as well. I've lots of projects in the works.

Happy Quilting! 😸


Monday, December 6, 2021

It's Mystery Time Again

Every year, I look forward to Bonnie Hunter's Mystery quilt which begins the day after Thanksgiving here in the US. It is fun to quilt along with so many others from around the world.

I've completed Clues 1 and 2 of this year's mystery--Rhododendron Trail.

Rhododendron Trail (Clues 1 and 2)


I'm looking forward to seeing how this mystery comes together. 

If you would like to participate, it is easy! Simply visit Bonnie's blog and click on the Rhododendron Trail tab at the top. All the instructions will be posted there each Friday. There is no need to sign up anywhere, and the mystery is free. Be aware that when the mystery is done, the instructions will be removed, so save them to your computer as you go.

Happy Quilting! 😸


Saturday, January 30, 2021

Tom's Big-Boy Quilt

 I like to make a flannel baby quilt for additions to the family.

Here is my grand-nephew's baby quilt.

Safari Baby


Once kids get big enough for a bed (rather than a crib), I like to make them a big-boy or big-girl quilt.

This big-boy quilt started with the backing--I wanted to use this Thomas (as in Tank Engine) fabric since my grand-nephew's name is Thomas.


I didn't know how I wanted to do the front, but the RR crossing sign gave me the idea to use Xs.

Tom's Big-Boy Quilt   64" x 84"

I used some novelty fabrics in it for a bit of I-Spy fun.

Tom's Big-Boy Quilt (detail)

Tom's Big-Boy Quilt (detail)

Tom's Big-Boy Quilt (detail)

Tom's Big-Boy Quilt (detail)

I finished it with a striped binding which I love (though it made me dizzy to cut it out!).

Tom's Big-Boy Quilt (backing and binding detail)

This was a fun project, and I enjoyed making it.

Happy Quilting!


Monday, December 14, 2020

Grassy Creek--Part 3

 So far, I'm keeping up with the clues in Bonnie Hunter's Grassy Creek mystery.


Haven't trimmed the dog ears yet!

It is a lot of fun, and it is not too late to start!


Wednesday, October 16, 2019

Expecting a Baby

No, not I!

My son and his wife will be parents in November. What is an Abuela to do in that situation? Make a quilt, of course!

I was going to try to make a calm, sedate baby quilt, but my style choices are usually about as peaceful as a riot. Once I saw the Laurel Burch flannel--I was a goner. No more plans for pale green and grey--I wanted her wild animals.

Wild Baby 42" x 54"

Wild Baby (backing)

Wild Baby (backing and binding detail)

I went with a simple pattern to show off the fabrics. Also, since today's babies lie ON quilts more than UNDER them, I wanted something without too many seams to create uncomfortable lumps.

I made sure that I didn't make the top too wide--I wanted to showcase the backing fabric without having to interrupt the pattern to widen it.

I had such fun working with these prints. I would find myself staring into the animals' eyes, just enjoying Burch's artistry. I hope my granddaughter enjoys it, too.


Sunday, September 29, 2019

No Passport Required (Part 2)

In my previous post, I outlined the steps I took in preparing to make this Trip Around the World quilt.

No Passport Required 112" x 122"

After the prep, it was time to sew!


I don't have many pictures of the actual sewing--it was just stitching square to square...to square...to square...

I worked from two corners towards the center, making two identical rows and attaching them to the previously sewn sections. In this way, I was building up two parts of the quilt at once. In the end, I would join the two pieces to create the whole quilt. The rows were long and bulky, but doing it this way helped me keep things in the right places--correct placement is essential to this design.

These was no fancy quilting design. I quilted this on my domestic sewing machine, so it was a matter of squeezing the large quilt through the machine. I did a simple straight stitch along the diagonal lines for quilting. It is rather plain, but my emphasis all along was on the fabrics, so the simple design worked well.

I am happy with the results of this project. I'm including several pictures of the fabrics, so you can see the range of the international motifs.


No Passport Required 112" x 122"

No Passport Required (center detail)

No Passport Required (fabric detail)

No Passport Required (fabric and binding detail)

No Passport Required (fabric detail)

No Passport Required (Where's Waldo?)

No Passport Required (There he is!)

No Passport Required (binding detail)


No Passport Required (backing)

No Passport Required (backing detail)

No Passport Required (fabric detail)

No Passport Required (center fabric detail)

I had such fun collecting fabrics for this. For the USA round, I bought some license plate fabric with state names and alternated it with fussy cuts from a fabric panel of a US map.

So there you have it--a Trip Around the World with no travel injections, no flight delays, and No Passport Required. Just think--you can travel the world without even getting out of bed! 😎


No Passport Required (Part 1)

I recently completed a Trip Around the World quilt. It is about as big as the world (112" x 122") and nearly as heavy! :)


This project took a lot of organization and planning, so I'm breaking the post about it into two parts.

I've wanted to do a Trip Around the World for a long time. However, unlike most of the patterns I found, I wanted to do it on-point. (I know--I'm crazy!) I found a pattern, not so much for the instructions on assembly, but for counts of the squares I needed and for planning the size.

The pattern is from Everyday Quilts designer Sandra Boyle. Because she is an Australian designer who doesn't have a business website, I went through broderie on Etsy to find the pattern. Lizzie, the shop owner in Melbourne, Australia, carries many Everyday Quilts patterns, and her shipping charges are very reasonable. The pattern is entitled Square Dance.

Click the photo for information.

As I mentioned, I wanted the pattern, in part, for the cutting instructions. It outlines how many squares of each of the thirty-one different fabrics you need to cut. I realize that I probably could have figured this out on my own, but having the list made it so much easier!

The pattern indicated that the quilt would be 65" x 71". Because I wanted to feature the prints with international themes, I decided to cut my squares larger than the pattern indicated, so more of the individual prints would be visible. Lots of math later (remember this quilt is on-point, so it takes diagonal thinking), I found that if I cut the prints the size I wanted to, the quilt would finish at around 109" x 128" (my final measurement was pretty close to that). Okay--that's HUGE--but to get the effect I wanted, it had to be done.

I needed to decide the order of the fabrics for the layout, so I pulled out what I planned to use and started lining them up.

Fabrics 1-9

Fabrics 10-21

Fabrics 22-30 (plus the yellow print for the setting triangles)

I tried to take both color and value into account in the arrangement. I also had to think of how much of each fabric I had. The outside rows take much more fabric than the inner ones.

I then further organized it as shown here.

I glued swatches of fabric on a file folder labeled by number.

I cut the number of squares of each fabric as indicated on the pattern and placed them in plastic bags labeled with their numbers in an open bin for ease of access.


All of this before I sewed a stitch! Looking back on the process, I'm glad I took plenty of time to get everything ready--it made the assembly so much easier.

Part 2 can be found HERE.


Thursday, July 11, 2019

Time to Catch Up!

I finally got some photos of the work I've been doing.

*****

Donation Quilts

I cut flannel scraps to make donation quilts. You can see the first batch HERE. They were kid size and made with kids' prints. The next ones were for adults.


Two with many florals

Three with plaids, stripes, and more

I layered them on the fence to take photos. They aren't identical, but they are made with the same mix of fabrics. All five are 60" x 72" and are backed with flannel.

*****

I've been using my 3.5" squares as Leaders/Enders this year. Here are three more I've put together for a total of eight. I don't have pictures of all of them, but they are all made the same way with a wide mix of scraps. They are 62" x 74" and are backed with solid colors.

Leader/Ender Project
I'll be continuing with the same leader/ender project this year. Though I've reduced my 3.5" square bin, it still has plenty of fabric left!

*****

I mentioned that I've been making Bonnie Hunter's quilt Sand Castles. You can see my previous posts here: 1, 2, 3, and 4.

Here she is--
Sand Castles (a Bonnie Hunter design) 84" x 84"

Sand Castles (backing and binding detail)

Sand Castles (detail)

Sand Castles (detail)
Though the design is titled Sand Castles, for some reason, the string squares remind me of birds' nests; thus, I used a backing fabric covered with birds on branches. This was a fun quilts to make--Bonnie Hunter writes great instructions, and it went together without a hitch!

*****

As I mentioned HERE, I have  been intimidated by Bonnie Hunter's Orca Bay pattern. I loved the quilt, but I was afraid to start it. I have overcome the fear and now I have my own version of the beautiful quilt. 

Meet my Orca Bay: The Christmas Edition.

 Orca Bay 80" x 90"

Orca Bay (detail)

Orca Bay (detail) The fabric with the beaver is from Christmas outfits I made for my kids over thirty years ago!

Orca Bay (detail) Look closely and you will find Waldo.

Orca Bay (detail) Santas, Cardinals, Snow People,...


Orca Bay (detail) Nutcracker, Peppermints, Christmas Goose,...

Orca Bay (detail) Musical Cat, Stripes, Dots,...


Orca Bay (detail) Santa Flamingo

Orca Bay (detail) And a partridge in a pear tree

I have made many Christmas quilts, but I never had one of my own--now, I do! 

Lesson Learned: Take one step at a time, and you can create something amazing, even if you are afraid.