Showing posts with label Original Design. Show all posts

Wednesday, December 22, 2021

Pinwheel Explosion

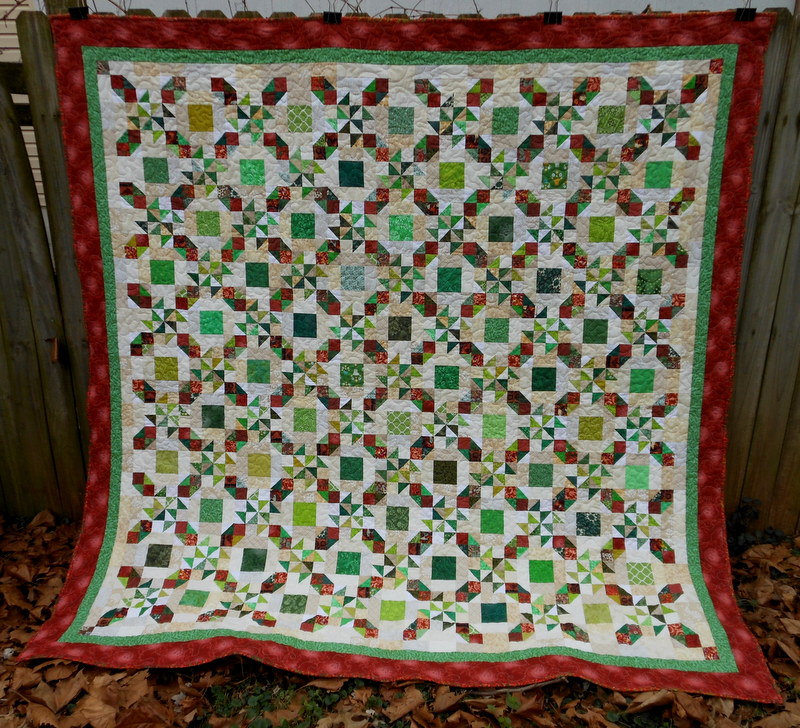
 This is a simple, scrappy quilt that I designed with different sizes of pinwheels.

Pinwheel Explosion (84" x 84")

The pinwheels finished at 12", 6", and 4". It could be made with 8", 4", and 2", if you prefer [or other sizes, if you want to do the math 😉].


Pinwheel Explosion (detail)
 

I arranged the pinwheels so that, on a bed, the smallest ones would fall in the center. I used scraps for the pinwheels themselves, though the background was cut from yardage.


Pinwheel Explosion (backing and binding detail)

I backed the quilt with a green brushstrokes print and bound it with a yellow/gold solid.


A very simple block and arrangement--sometimes, simple is just the ticket! 🎫


Happy Quilting. 😸


Thursday, January 10, 2019

Stringy Lanes

I decided to make another traditional pattern but with the addition of string blocks.

I made a Sunny Lanes pattern in the past using calico in place of the usually solid "lane" fabric. My post about that quilt can be found HERE.

Calico Sunny Lanes

This time, I replaced the four-patch blocks with string blocks.

Stringy Lanes 74" x 94"

This is a larger quilt than the first, and I'm not really happy with how the lanes at the edges worked. Next time, I need to take a bit more time in the planning stage, to create a more symmetrical pattern.

I do, however, love the colors and fun fabrics.

Stringy Lanes (detail)

Stringy Lanes (detail) Two little monkey faces

Stringy Lanes (detail) Nutcrackers and chocolates

Stringy Lanes (detail) Inspector Clouseau and a chicken


Stringy Lanes (back and binding detail)


This was a fun project. It is easy to replace traditional blocks with string blocks to make a new variation on an old favorite.


I'm almost finished with the top of my Good Fortune quilt (Bonnie K. Hunter's Mystery). I'll have pictures soon.

Happy quilting!

Thursday, September 20, 2018

Blogger's Quilt Festival 2018

The Blogger's Quilt Festival is on at Amy's Creative Side. Join in and take a look at all the wonderful quilts featured there.

This quilt is an original design I call Stars on Strings.

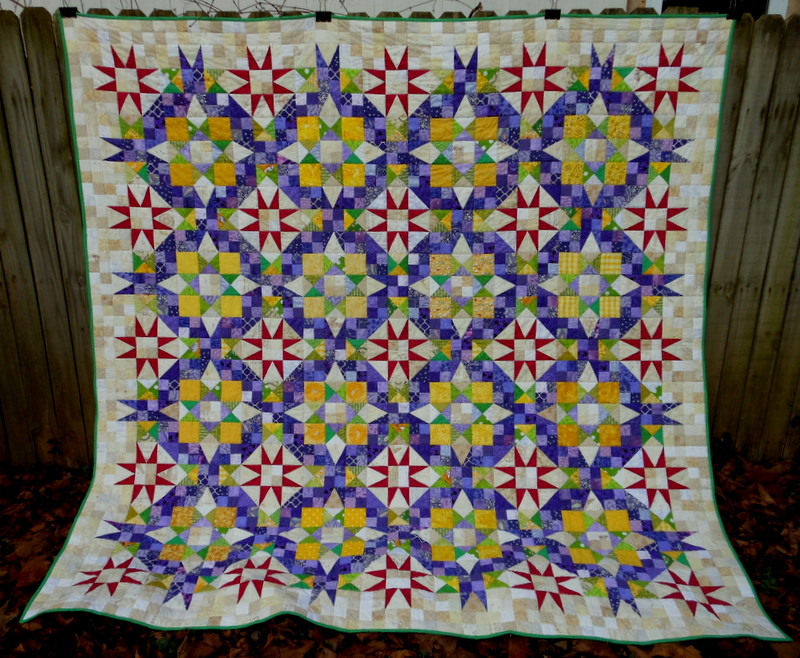
Stars on Strings  66"x 88"


Stars on Strings (detail)


Stars on Strings (backing and binding detail)


You can see how I made it HERE.

Thanks Amy, for the opportunity to share and to look at beautiful quilts from many other quilters.

Sunday, July 29, 2018

Stars on Strings--An Original Design

This quilt began on graph paper. I have an EQ program, but I was defeated by triangles!

Stars on Strings--66" x 88"


I tried this more than once. My first experiment was to use regular, brightly-colored strings.


As you can see, the red stars are lost amidst the chaos!


I went to neutral strings which worked better to show off the stars.

Please forgive the camera strap in the corner!

 I stayed with this idea, though, for me, it was hard--I always want MORE COLOR!


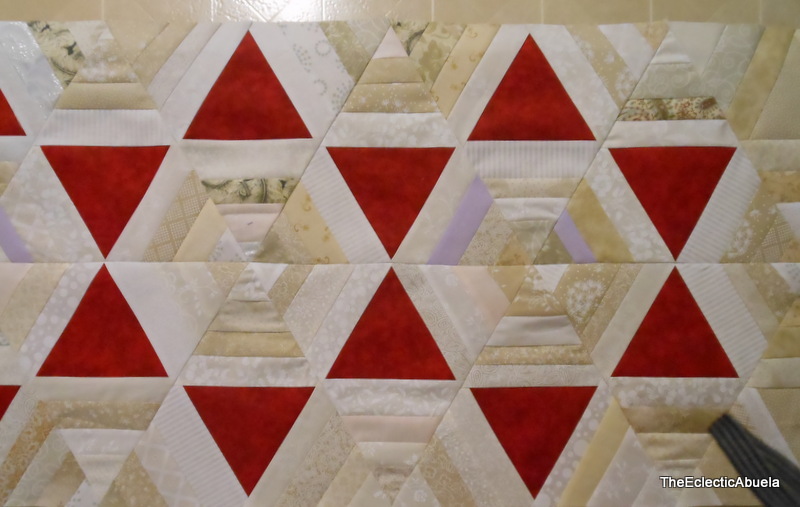
The making wasn't too hard, though 60 degree triangles can be tricky to assemble. It was simple string piecing for the blocks.

8.5" paper foundation 60-degree triangle

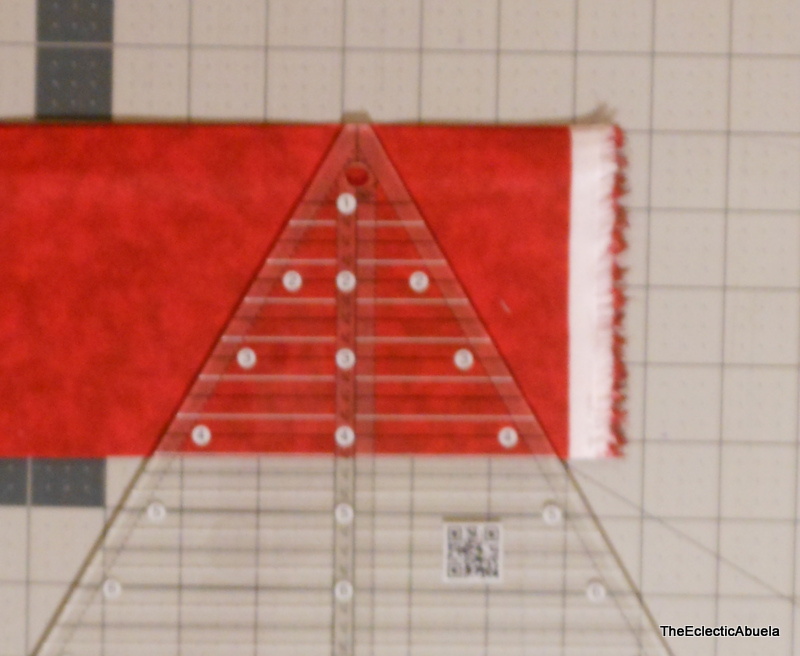
4.25" red triangle (sorry the picture is so fuzzy)

Pieced triangle (ignore the partial to the right)

I didn't get a picture of the step of gluing the triangle to the foundation, but you can see its placement here. After the triangle was secured, I simply string pieced the three areas around it.


When I had finished the pieces, I assembled it in rows.


This is when the stars and hexagons show up--you have to keep the faith through the piecing; they will eventually be there!


The edges of a triangle quilt are uneven. I didn't want to trim off all the piecing work to make them straight, so I pieced some half-triangle for the ends.

Now you can look at the piece on the right!
I did these half-triangles with neutral centers, so as not to distract from the star pattern. I also used a narrow (1.5") coping strip (border) at the top and bottom of the quilt, so I could manage my triangle points better for binding. I didn't want to lose them. 😉

You can see both the half-triangle ends and the coping strip here.


I had intended to use a pieced backing, but with the weight of all the strings on the front, I was afraid it would be too much. Instead, I chose this backing fabric both because of the color and the pattern--the hexagons echo those on the front.


All in all, this was a successful experiment, though I must admit that I am heartily sick of neutral strings for now!


Now, please, bring on the color!

I'm linking with Jo's Country Junction String Challenge,  Fiber Tuesday 167 at The Quilting Room with Mel, and Confessions of a Fabric Addict.


Sunday, March 4, 2018

Boxes Of Strings: An Original Design

Update: I have added the basic instructions for this quilt to my sidebar. Click on "Boxes of Strings Instructions."
 

When I was designing and making Stringing Beads, I thought "what if?"--always a dangerous thought for a quiltmaker!

The centerpiece of the Stringing Beads block is a trapezoid shape.

Stringing Beads trapezoid


What if I made it a triangle?

Boxes of Strings triangle


I used the same size paper foundation (4.5" x 8.5"), and I arranged the strings with medium/dark tone on one side and light on the other.

All blocks have the same color orientation.


It created a wonderful optical effect, I think--boxes and boxes and boxes!

Boxes of Strings 74" x 84"


A huge variety of fabrics add interest.

Boxes of Strings (detail)


Boxes of Strings (detail)


Boxes of Strings (detail)--Scooby Doo!


I used a solid backing and quilted around the diamonds and through the string blocks.

Boxes of Strings (backing and binding detail)


This was a lot of fun to create. The instructions are very like the Stringing Beads instructions found on the right sidebar of the blog. Just make a triangle template and arrange your colors, light and medium/dark, on either side of the triangle--all the blocks are the same. (In my case, the light strings are on the right side and medium/dark on the left of an upward-pointing triangle.)

Sometimes wonderful things come from those "What if?" moments!

I'm linking with Fiber Tuesday 147 at The Quilting Room with Mel and the UFO Challenge at Jo's Country Junction.

Thursday, October 19, 2017

Birds and Fruit

I wanted to make a quilt for a friend, and I decided to use some panels I bought quite a long time ago with her in mind.


I rarely use panels, so I worked up a quick layout by measuring them and constructing alternate blocks in the same size.

The dark rectangles represent the panels.


The construction was easy, and soon I had a top.

Top before quilting


Luckily, I bought some fabric to match the panels when I originally got them--it was perfect for the centers of the alternate blocks, the backing, and the binding.


Backing and binding detail


After quilting, I gave it a wash, and now it is ready to go!

Birds and Fruit  66" x 74"


I think the panels look good surrounded by the very simple alternate blocks--I didn't want it to be too busy.

I enjoyed making this--it can be fun to design around a special fabric you want to use.

I'm linking with Fiber Tuesday 132 at The Quilting Room with Mel.


Monday, September 18, 2017

Blogger's Quilt Festival--Stringing Beads

I'm excited to be a part of the Blogger's Quilt Festival (Fall 2017) at Amy's Creative Side.


Stringing Beads is an original design. I love string quilts, and I tried to think of a new way to make one. This is the result.


Instructions for this quilt can be found HERE.


Thanks to Amy for hosting the Festival!


Saturday, June 17, 2017

Stringing Beads--An Original Design

I love making string quilts. When I came up with this design, I decided to combine it with the April Multicolor Rainbow Scrap Challenge from soscrappy.


You can find previous posts about this quilt HERE (Part 1) and HERE (Part 2).


Without further ado, here is Stringing Beads:

Stringing Beads 68" x 75"


Stringing Beads (detail)


Stringing Beads (quilting detail)


Stringing Beads (backing detail)

I have no idea why the color went wonky in the last photo!


This is the most densely quilted piece I have ever made, but I like the effect. I am glad to have this one done. The quilting took a long time, (I'm not usually one who uses quilting for effect--it is my least favorite part of the process, and it is the one I am the least confident about.) but I'm glad I did it.


It is nice to see an idea become reality! Thanks, soscrappy, for spurring me to create.

For basic instructions on how I made this quilt, look HERE, or click the link on the right sidebar of the blog labeled "Stringing Beads Instructions."

I'm linking with Fiber Tuesday 116 at The Quilting Room with Mel and Jo's Country Junction UFO Progress.


Monday, June 12, 2017

Rainbow Scrap Challenge--June--Yellow & May--Green

With the flooding cleanup in May, I fell behind in my photography of my RSC blocks. This month (June) is yellow and last month was green. I decided to wait to photograph and post them both at the same time.

Here is a sample of my sunny June blocks:


While yellow is not my favorite color, these make me smile. (Of course, Big Bird, ruby slippers, and a French hen help!)


Here is a sample of my May blocks:


I love all the shades of green included here. I've used a lot of green this year, so the scraps were handy:


Green hourglasses for En Provence


En Provence


Green squares and green and neutral HSTs for Twirl Around

Twirl Around


I'm getting ready to quilt the top I made for April's multicolor challenge. I'm calling it "Stringing Beads":

Stringing Beads


I am enjoying this year-long challenge. Thanks to soscrappy for hosting it.


I'm linking to ScrapHappy Saturday at soscrappy.