Showing posts with label Floral Fabrics. Show all posts

Saturday, August 27, 2022

Maymont

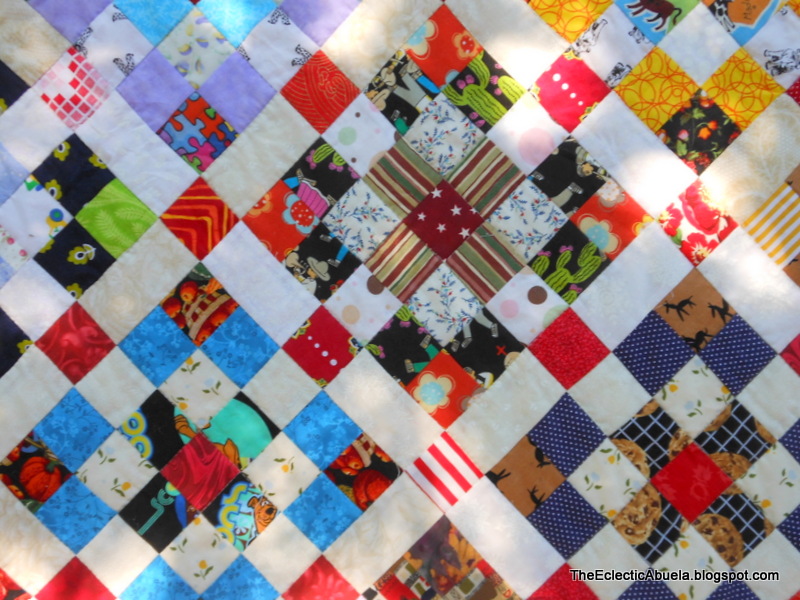
Maymont--A Bonnie Hunter design--80" x 92"


Earlier this summer, I began Maymont, a design by Bonnie Hunter. That post is HERE.

This quilt is a hodge-podge of fun fabrics.

Maymont (fabric detail)


Maymont (fabric detail)


Maymont (fabric detail)

 I had so much fun re-visiting some of these fabrics! They make an overall impression, but when you look more closely there is much to find.

I backed it with a favorite floral--to me, these look like the painted roses in Alice. I was fortunate to have a binding fabric that complemented the backing--the shades of color are almost identical!

Maymont (backing and binding detail)

Unlike the original pattern, I used reds for all the cornerstones to bring a bit of control to my crazy riot of scraps.

This is a great pattern. Thanks, Bonnie!

Happy Quilting! 😸


Tuesday, November 9, 2021

Anne of Green Gables

 A young lady very dear to me is turning two! I marked the occasion with a big girl quilt.

Anne of Green Gables (72" x 72")


 I made this from a fat quarter bundle, a panel, and a few additions from stash. The panel had a double friendship star motif, so I replicated it in the quilt. (Kindred Spirits fabric line by Riley Blake)


Anne of Green Gables (detail)

I used some of the larger elements from the panel in a few of the centers. In others, I fussy cut quotes from the books from the fabrics and used those.


Anne of Green Gables (detail)


The center square of the quilt was cut from the panel.


Anne of Green Gables (detail)


I backed it with a pink brushstrokes print and bound it in aqua.

Anne of Green Gables (detail)


I also made an Anne doll to go with the quilt, and I included three different editions of the book with the gift.


Anne of Green Gables Doll


 I think the gift was a hit!


Happy Birthday, sweet girl!


Happy Quilting! 😸


Friday, November 13, 2020

Floral Trip Around the World

 I just love this pattern!

Floral Trip Around the World 90" x 100"

Floral Trip Around the World (back and binding detail)


I made this quilt once before with a travel theme. This time I used florals and a range of solid colors. It was another quilt that requires careful planning and organization, but it was fun to make!

I used a cheater fabric for the back to continue the floral idea, then I added a striped binding to finish. It is brighter than it looks in the photo--I took the photo on a cloudy day.

Happy Quilting!


Friday, September 13, 2019

Disappearing Nine-Patch Quilts

A lovely lady sent me the fabrics for these donation quilts. I am thankful to her for that! I added a little from my stash, and voila!

Morning Glories 66" x 66"

Morning Glories (back and binding detail)

Floral with Green 66" x 66"

Floral with Green (back and binding detail)

I'm stacking up donation quilts to take to the agency where I donate them around Thanksgiving time. I know these two will be loved!

Monday, January 18, 2016

She is Plain, but She is Done!

I've been working on units for several quilts (small pieces), and I was feeling the need to finish something.


This is from the "Wickedly Easy" quilt pattern (available free online). The pieces felt enormous! I used leftover bits and pieces on the back.


I'm not thrilled with the lack of color/value contrast, but she is soft and warm, and I'm sure someone will love her.


Saturday, October 3, 2015

Mystery Solved!

I finished the mystery quilt I wrote about in my last post: It's A Mystery


I'm having a hard time getting a good photo of these fabrics, but here are a couple of tries. The darkest color is maroon--not purple.


The more I look at it, the more I think I should have continued some of the diagonals into the border to create a more finished look--if I do this pattern again, I'll try that.

It is 70" x 82" with the borders and binding. The pattern is pretty simple, and it goes together well.


One fewer unsolved mystery in the world!

Saturday, September 19, 2015

It's A Mystery!

A quilter on a forum I belong to hosts free Mystery Quilt Train Rides two or three times a year for anyone who wants to join in. I am very thankful to her for taking the time to design and write out instructions for us. Here is what we are working on--she gives us one clue per week.


Clue #1:


Clue #2:


Clue #3:


Completed block:


Beginning layout for assembly:


I can't seem to get the fabrics to photograph true-to-color--the burgundy of the completed block photo is the closest.


It is a lot of fun participating in these mysteries with other quilters. The range of colors and fabrics is amazing. I have heard quilters say that they would like to do a mystery quilt, but that they are afraid of the expense--especially since they might not like the end result. I always use inexpensive fabrics for these (at least the first time--sometimes I repeat the pattern), and I figure that if I don't like the result, someone else will--I can always give it to him/her!


Edited to add: Here's where I am today. Not good image quality, but the overall pattern shows up now. I will audition borders next.


Saturday, September 5, 2015

Improvisational Quilt


This quilt began as an experiment in making hourglass/QST blocks. You can see the post about it here: Hourglass Blocks. Then, I added four-patches. Then I added some more four-patches. Then I added a border. Then I added another border... Let's just say it grew improvisationally.


I made a layout plan on EQ7 after I made the blocks.


The actual quilt looks a bit different, but I am so glad to have the EQ7 program for a layout tool.


I used a black paisley print for the backing and binding.


I like the quilt, but I love all shades of red (except those with yellow in them). I'm hoping the color combination won't be too jarring for the quilt's recipient.


This quilt grew in the making; I didn't begin with an overall plan. Perhaps I should call myself The Experimental Abuela!

Linked to My Quilt Infatuation

Wednesday, June 24, 2015

Flowing Flowers

A Spiderweb Quilt With a Different Layout


A spiderweb quilt is a type of string quilt and is constructed basically the same way (previous tutorial with instructions here). The difference is that instead of beginning with a square foundation, you begin with a triangle.


As with the square foundation, you secure your center strip. (I use a washable glue stick.)


Add a strip to one side of your center fabric.


Fold back and crease with your fingernail or an iron.


Add a second strip to the other side.


Press back.


Each of these has a center and one strip on each side.


Continue to add strips until your triangle is covered. Trim as shown in previous tutorial.


Four triangles will be sewn together to create a star. As you line up the stars, the spiderwebs form.


Your eyes are not deceiving you--this picture is of another spiderweb I made!


A basic spiderweb quilt has all the stars in straight rows.


A serpentine layout has off-set blocks. I first saw this layout on the Quiltville blog  here. Note the difference in the rows of stars. While the vertical columns are straight, the horizontal rows are off-set. This is accomplished by adding a half-block at the bottom and the top of every other vertical column.


Rather than creating spiderwebs, this off-set layout creates the serpentine pattern.


 I'm not much of a snake fan (even the word serpentine brings "a tighter breathing, And zero at the bone" to quote Miss Dickinson), so I prefer the idea of the currents in a stream. Combined with the fact that all the prints in this quilt are florals, I chose the name Flowing Flowers for this quilt.


Here are close-up shots that show the backings I chose for each of the spiderweb quilts shown above.


If you enjoy making square string blocks, give the triangles a try. It is fun to see the secondary patterns come together.