Showing posts with label Bowtie. Show all posts

Monday, April 4, 2022

Three Finishes

 I haven't been posting much lately, but the quiltmaking continues!


This is a flannel couch quilt. A dear friend gave me some flannels, and I added a few of my own to the mix. I backed it with a piece of fleece I had on hand that happened to be exactly the right size!


Old-Style Winter Print Flannel (60" x 71")

Old-Style Winter Print Flannel (detail)

Old-Style Winter Print Flannel (backing and binding detail)

Next up is a Hallowe'en Trip Around the World. I know it is out-of-season, but next October, I'll be ready! 🎃 I call this one Spooky Trip Around the World.


Spooky Trip Around the World (90" x 90")


Spooky Trip Around the World (edge detail)


Spooky Trip Around the World (center detail)


This third quilt is a Bonnie Hunter design called Boxy Bow Ties. For some reasons, it sits in my brain as Botox Ties! Other than string quilts, this might be the scrappiest quilt I've ever made. There is a little of everything in here. I added a few extra cornerstones in the sashing that weren't part of the original design.


Boxy Bow Ties (94" x 94")

Boxy Bow Ties (detail)

Boxy Bow Ties (detail)


Boxy Bow Ties (backing and binding detail)


I'm still working on the Bonnie Hunter mystery quilt, Rhododendron Trail, and I'm doing her Hearts of Hope quiltalong as well. I've lots of projects in the works.

Happy Quilting! 😸


Monday, June 8, 2015

I-Spy Bowtie (and alternate layouts)

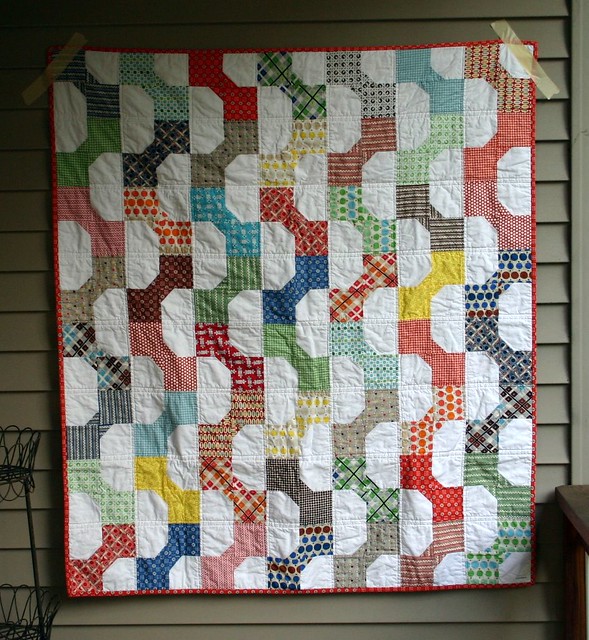
I finished the I-Spy Bowtie quilt:


It ended up 90" x 90"--a bit of a bear to wrangle while quilting, but it was all straight lines which helped.


There are several ways to lay out these blocks. (Note: Clicking the image will take you to the site on which it was originally posted.)


Bowtie 1

This one brings the blocks together in the centers and creates a central octagon secondary pattern.


Bowtie 2


This one alternates direction in every other row.


Bowtie 3

This one has sashing between the blocks which pulls the ties away from each other.


Bowtie 4

This one is set on point (diagonally placed blocks).


Bowtie 5

Bowtie 6

These two have carefully placed blocks to create an overall pattern.


I chose the classic layout, since I wanted the fabrics to be the focus. In the layout I chose, the printed blocks only come together at the points, rather than along the sides, serving to highlight the fabrics rather than the layout.

Wednesday, June 3, 2015

Quilting the Monster

I'm quilting my Bowtie quilt today. It's 90" x 90", so it takes some effort to wrangle it!


From owls and outhouses


to Pink felines and flaming dogs.


My conversations with myself are a bit odd:

"Right between the fire ants and the lobsters," and "Start to the left of the nachos." :)

Tuesday, May 19, 2015

The Bowtie Block


A bowtie block is essentially a four patch.
 

To make a block the same size as my photos, you will need two 4” background squares (white in photo), two 4” print squares (puzzle print), and two 2” print squares (puzzle print). You can make them any size—just keep the ratios the same.


You are going to snowball one corner of each background square with one of the small print squares. To do this, you will draw a diagonal line on the wrong side of your 2” squares. This will be your stitching line. Line the small block up with a corner of the background block and stitch.


Your corner will now have three layers. You can trim off the bottom two layers to a 1/4" seam allowance, trim just the center layer, or you can leave them untrimmed. Leaving them untrimmed creates a bit of bulk, but I like the definition in the “knot” of the tie. However you decide to trim, press the triangle portion flat.


The end result looks like this. 

Note, I was making two blocks at the same time, so I have 4 snowballed squares.


The block will be assembled like any other four patch. Sew the top two squares together and press your seam towards the large print block. Repeat with the bottom two. Your seams will be going in opposite directions when you sew the pairs together into the four patch, so your seams will nest and your center seams will line up.

Note the direction of the placement of the snowballed squares--they come together to create the "knot."


Here is your finished block. It should measure 7 1/2". (It will be 7" when sewn into the quilt.)


There are many ways to arrange these. I’ll be putting mine together to form a quilt, and I’ll show some layouts then.