Wednesday, October 16, 2019

Expecting a Baby

No, not I!

My son and his wife will be parents in November. What is an Abuela to do in that situation? Make a quilt, of course!

I was going to try to make a calm, sedate baby quilt, but my style choices are usually about as peaceful as a riot. Once I saw the Laurel Burch flannel--I was a goner. No more plans for pale green and grey--I wanted her wild animals.

Wild Baby 42" x 54"

Wild Baby (backing)

Wild Baby (backing and binding detail)

I went with a simple pattern to show off the fabrics. Also, since today's babies lie ON quilts more than UNDER them, I wanted something without too many seams to create uncomfortable lumps.

I made sure that I didn't make the top too wide--I wanted to showcase the backing fabric without having to interrupt the pattern to widen it.

I had such fun working with these prints. I would find myself staring into the animals' eyes, just enjoying Burch's artistry. I hope my granddaughter enjoys it, too.


Sunday, September 29, 2019

No Passport Required (Part 2)

In my previous post, I outlined the steps I took in preparing to make this Trip Around the World quilt.

No Passport Required 112" x 122"

After the prep, it was time to sew!


I don't have many pictures of the actual sewing--it was just stitching square to square...to square...to square...

I worked from two corners towards the center, making two identical rows and attaching them to the previously sewn sections. In this way, I was building up two parts of the quilt at once. In the end, I would join the two pieces to create the whole quilt. The rows were long and bulky, but doing it this way helped me keep things in the right places--correct placement is essential to this design.

These was no fancy quilting design. I quilted this on my domestic sewing machine, so it was a matter of squeezing the large quilt through the machine. I did a simple straight stitch along the diagonal lines for quilting. It is rather plain, but my emphasis all along was on the fabrics, so the simple design worked well.

I am happy with the results of this project. I'm including several pictures of the fabrics, so you can see the range of the international motifs.


No Passport Required 112" x 122"

No Passport Required (center detail)

No Passport Required (fabric detail)

No Passport Required (fabric and binding detail)

No Passport Required (fabric detail)

No Passport Required (Where's Waldo?)

No Passport Required (There he is!)

No Passport Required (binding detail)


No Passport Required (backing)

No Passport Required (backing detail)

No Passport Required (fabric detail)

No Passport Required (center fabric detail)

I had such fun collecting fabrics for this. For the USA round, I bought some license plate fabric with state names and alternated it with fussy cuts from a fabric panel of a US map.

So there you have it--a Trip Around the World with no travel injections, no flight delays, and No Passport Required. Just think--you can travel the world without even getting out of bed! 😎


No Passport Required (Part 1)

I recently completed a Trip Around the World quilt. It is about as big as the world (112" x 122") and nearly as heavy! :)


This project took a lot of organization and planning, so I'm breaking the post about it into two parts.

I've wanted to do a Trip Around the World for a long time. However, unlike most of the patterns I found, I wanted to do it on-point. (I know--I'm crazy!) I found a pattern, not so much for the instructions on assembly, but for counts of the squares I needed and for planning the size.

The pattern is from Everyday Quilts designer Sandra Boyle. Because she is an Australian designer who doesn't have a business website, I went through broderie on Etsy to find the pattern. Lizzie, the shop owner in Melbourne, Australia, carries many Everyday Quilts patterns, and her shipping charges are very reasonable. The pattern is entitled Square Dance.

Click the photo for information.

As I mentioned, I wanted the pattern, in part, for the cutting instructions. It outlines how many squares of each of the thirty-one different fabrics you need to cut. I realize that I probably could have figured this out on my own, but having the list made it so much easier!

The pattern indicated that the quilt would be 65" x 71". Because I wanted to feature the prints with international themes, I decided to cut my squares larger than the pattern indicated, so more of the individual prints would be visible. Lots of math later (remember this quilt is on-point, so it takes diagonal thinking), I found that if I cut the prints the size I wanted to, the quilt would finish at around 109" x 128" (my final measurement was pretty close to that). Okay--that's HUGE--but to get the effect I wanted, it had to be done.

I needed to decide the order of the fabrics for the layout, so I pulled out what I planned to use and started lining them up.

Fabrics 1-9

Fabrics 10-21

Fabrics 22-30 (plus the yellow print for the setting triangles)

I tried to take both color and value into account in the arrangement. I also had to think of how much of each fabric I had. The outside rows take much more fabric than the inner ones.

I then further organized it as shown here.

I glued swatches of fabric on a file folder labeled by number.

I cut the number of squares of each fabric as indicated on the pattern and placed them in plastic bags labeled with their numbers in an open bin for ease of access.


All of this before I sewed a stitch! Looking back on the process, I'm glad I took plenty of time to get everything ready--it made the assembly so much easier.

Part 2 can be found HERE.


Friday, September 13, 2019

Disappearing Nine-Patch Quilts

A lovely lady sent me the fabrics for these donation quilts. I am thankful to her for that! I added a little from my stash, and voila!

Morning Glories 66" x 66"

Morning Glories (back and binding detail)

Floral with Green 66" x 66"

Floral with Green (back and binding detail)

I'm stacking up donation quilts to take to the agency where I donate them around Thanksgiving time. I know these two will be loved!

Friday, September 6, 2019

Still Solving the Mystery

I've almost completed the mystery from Kevin the Quilter.


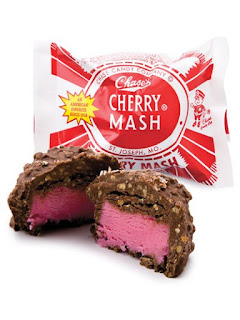
This is only a part of the top, but I'll get a better picture when it is done. I'm calling it Cherry Mash after the Missouri-based candy.

https://cherrymash.com/
Click photo to learn more about Cherry Mash


If you would like to make Kevin's pattern, the clues can be found HERE. Thanks to Kevin for the summer fun!


Saturday, August 17, 2019

Mystery Time

As I mentioned last time, my pink scrap bins are full, so when Kevin the Quilter announced this mystery in two colors, I knew one of those colors would be pink.


I chose to pair it with brown--another color of which I have an overabundance.  In the first two clues, we made four-patches.


I did a mystery with Kevin last year with this result.


I'm looking forward to the next clue!

I'm also working on another project that I can't show yet, and I'm putting together more scraps for donation quilts. It is, however, time for the semester to begin, so things are about to get very busy.

Happy Quilting. 😸


Sunday, July 21, 2019

Spun Sugar

My pink scrap bins were overflowing!

Spun Sugar 70" x 78"

Spun Sugar (backing and binding detail)

Spun Sugar (detail)

Lots and lots of pinks--yet I still have more! Look closely and you might find Waldo. 😊

I called this Spun Sugar because it looks (to me) like cotton candy (candy floss in the UK). It is a spiderweb pattern, so "spun" works too, since spiders spin their webs! Lots of fun bits and pieces went into this--I just love making string quilts!


To continue the sweet theme: PIE! Peach, to be exact.


 Have a sweet day! 😋