The Gourmet Quilter (SusanClaire Mayfield--a quilter from New Zealand) makes some wonderful video tutorials. Ever since I saw her "Floating Four-Patch" lesson I've wanted to try it. Her tutorial can be found here:"Floating Four-Patch"
One reason I like this one is that it sets the four-patch block on point without all the diagonal thinking I have to do when setting blocks on point. (Diagonal thinking is NOT my strong suit!) I also like the fact that there is plenty of "float" (space) between the corners of the four-patches. This gives a very clean look to the pattern. Third, in this tutorial, SusanClaire uses five-inch squares--a size I cut many of my scraps into, so I have a ready-made supply.
So, today I decided to experiment with the block. ("Experiment" sounds so much more grown-up than "play," right?)
Choosing and Cutting Fabrics
As I mentioned, I have a supply of five-inch blocks. I thought I'd start by making eight blocks, so I chose eight print squares and sixteen solid color squares.

I cut each of the print squares into four equal pieces (2.5" square),

and I cut the solids diagonally into two equal triangles.

Sewing the Block
I began by making the center four-patches.
Sew the 2.5" blocks into pairs. I chain pieced mine.

Clip the pairs apart.

Press seams to one side. Since I was mixing prints with no real rhyme or reason, the direction of the seam didn't matter.

Sew the pairs into fours. Be sure to nest your pressed seams so your center seams will line up.

Clip the units apart and press open (again, the pressing direction isn't important here).

Next, you will sew the triangles onto the four-patch. Take care with the edges of the triangles. Because they are cut on the bias, they can stretch easily.
Lay one triangle on one four-patch, right sides together. The edge of the triangle will line up with the edge of the four-patch, and the point of the triangle will line up with the center seam.

Using a regular .25" seam allowance, stitch the triangle to the four patch as indicated below.
 | |||
| If you click this picture to make it larger, the seam will be easier to see. |
Flip the first triangle back, and place the second on the opposite side of the four-patch. Stitch as you did the first.

Press the two triangles away from the four-patch. Be careful to press without pulling on the triangles too much.

At this point, you will trim the block as indicated in the following photo. This will give you an even edge to follow when adding the last two triangles.

After trimming, your block will look like this:

The third triangle will be added as the first two were.

Look carefully at the stitching line in the next picture. It extends all the way across the third triangle, not just the area where the four-patch is.
 |
| Again, you may need to click on this picture to see it more clearly. |
As you did with the first triangle, flip the third triangle back, so you can line up the fourth.
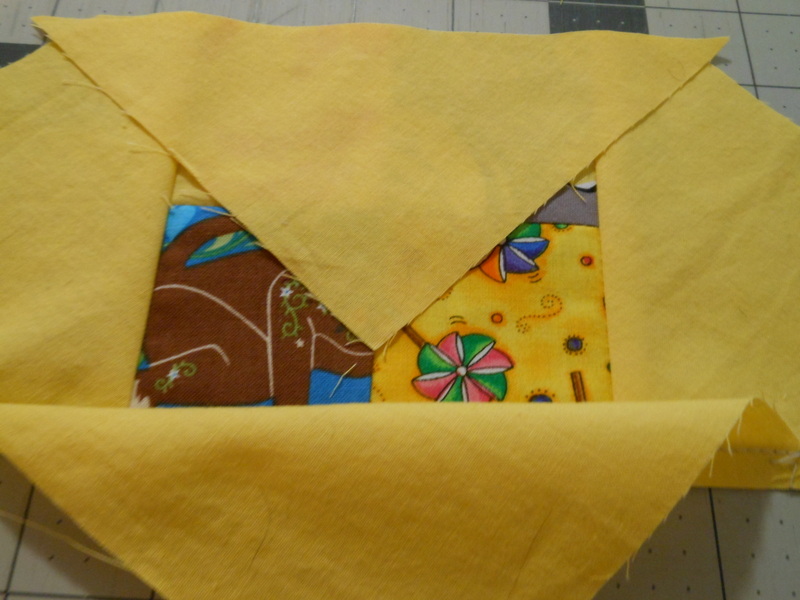
Stitch as you did the previous triangle, and press triangles three and four away from the four-patch.
You will now square up your block. I squared mine to 7".
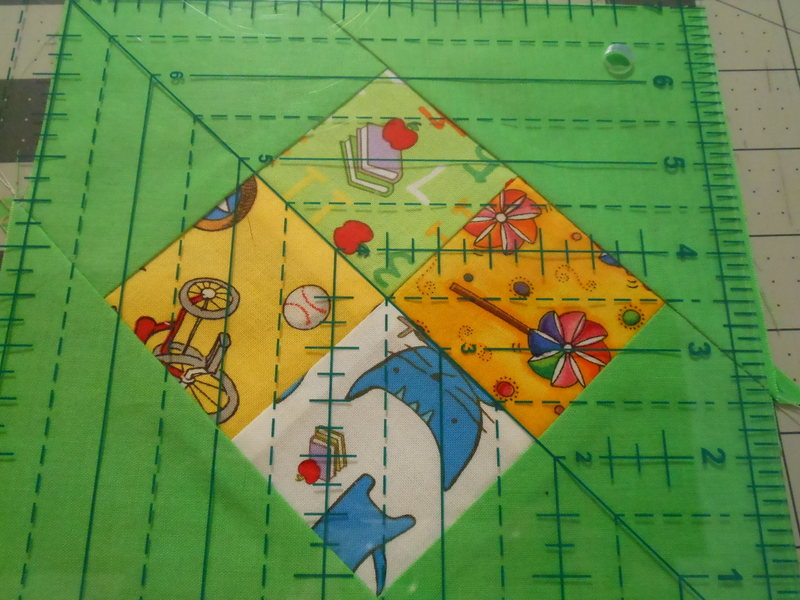
You will need to be sure your block is centered under your ruler, so they "float" (space around your four-patch) evenly in the block.
 |
| The float--the distance between the corner of the four-patch and the edge of the block. |
 |
| The 45° line matches up with the center seam of the four-patch. From the center point of the four-patch, this block measures 3.5" to the center of each side of the block when properly trimmed. |
Here are my eight blocks.

It wasn't until I put them together that I noticed the secondary patterns that are formed if you place them a certain way:
 |
| Cross secondary pattern in the center solids |
 |
| Hourglass secondary pattern in the center solids. |
Things I've Learned From This Experiment
My thought had been to use a constant neutral solid for the triangles; however, that was before I discovered the secondary patterns. I'll have to think more about this.
The triangles are easier to work with if the material is stiffer. Starching the five-inch squares before cutting the triangles would make them easier to work with.
Trying to explain how to square up this block is much harder than actually doing it!
No comments:
Post a Comment
I love your comments! I have, however, had to add moderation of comments because of spammers. Thanks for your patience.
Happy Quilting,
The Eclectic Abuela